The mentioned functionalities may be restricted depending on the purchased software license.
Aan de slag met openbare displays
De openbare displays tool van SmartgridX is ontworpen om volledig aanpasbare visualisaties voor installaties te genereren. Of je nu interne analysemethoden dashboards of snelle en toegankelijke visuele displays nodig hebt, openbare displays bieden flexibele, aanpasbare en gebruiksvriendelijke configuratieopties.
Deze gids biedt een snelstartoverzicht van openbare displays, waarin de belangrijkste componenten en hun effectieve gebruik worden behandeld. Gedetailleerde informatie over elke component is beschikbaar op hun respectieve documentatiepagina's.
⚠️ Deze functie is momenteel in actieve ontwikkeling - nieuwe functies en opties zullen continu worden toegevoegd. Voor suggesties of functieaanvragen, neem contact op met ons steunteam.
Overzicht
Het openbare display systeem stelt gebruikers in staat om aangepaste visualisaties voor hun installaties te creëren met volledige controle over de layout en inhoud van het display.
Workflow Samenvatting
Om openbare displays in SmartgridX in te stellen, volg je dit drie-stappenproces:
- 🎛️ Claim je controller - Registreer de openbare display controller op je account
- 📐 Maak een sjabloon - Ontwerp de visuele layout voor je installatie
- ⚙️ Configureer het openbare display - Configureer het sjabloon voor jouw installatie en koppel het aan de controller
💡 Pro Tip: Je kunt sjablonen maken en testen zonder fysieke hardware - sla stap 1 gewoon over om je ontwerpen te bekijken voordat je ze uitrolt.
Stapsgewijze Setup
1. Openbare display Controller
📖 Voor gedetailleerde informatie over controllers, bezoek de Openbare display Controller documentatiepagina.
Deze sectie behandelt het claimen en beheren van je openbare display controller hardware.
🚀 Snelle Start Optie: Wil je openbare displays verkennen zonder hardware? Sla over naar Stap 2: Sjablooncreatie om sjablonen te ontwerpen en voorvertonen. Je kunt altijd later een controller claimen!
⚠️ Opmerking: Zonder een geclaimde controller kun je nog steeds sjablonen maken en configureren om het eindresultaat te bekijken, maar het openbare display wordt niet op fysieke hardware weergegeven.
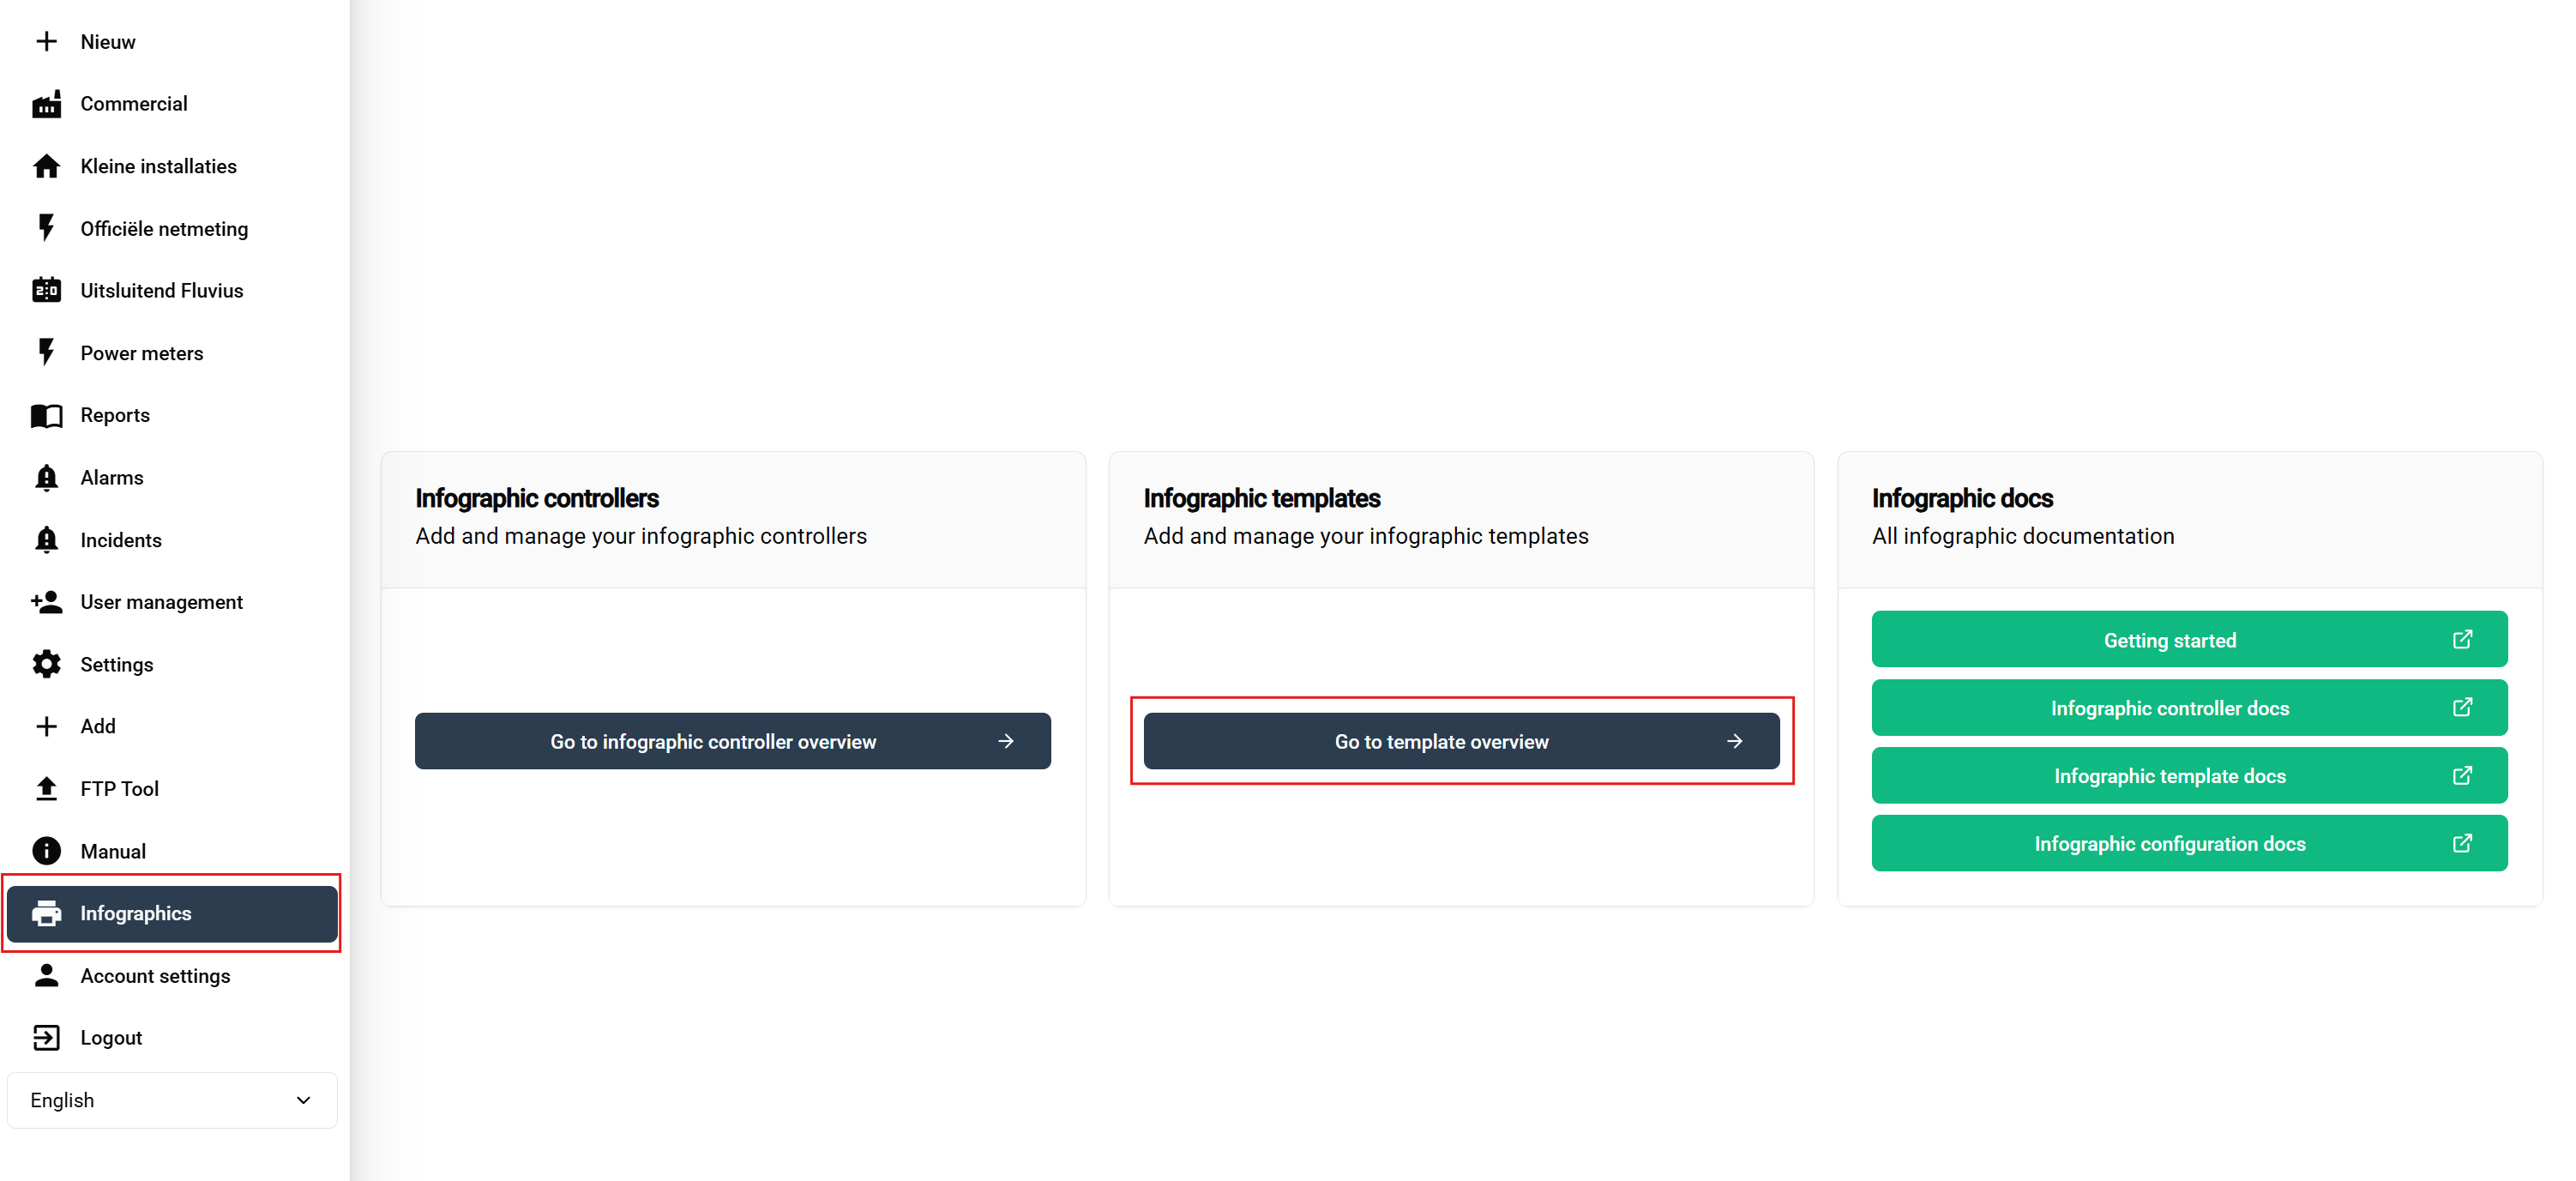
Navigatie naar Controllerbeheer

- Navigeer naar Openbare displays: Klik in de zijbalk op de 'Openbare displays' sectie
- Toegang tot Controller Sectie: Op de overzichtpagina, zoek en klik op de Openbare display Controller knop (gemarkeerd in de schermafdruk hierboven)
Controller Overzichtstabel

De controller tabel toont:
- 📋 Overzicht van al je geregistreerde controllers
- ➕ Nieuwe controllers claimen knop (bovenaan rechts)
- ✏️ Beheer opties voor bestaande controllers
Claimen van Je Controller
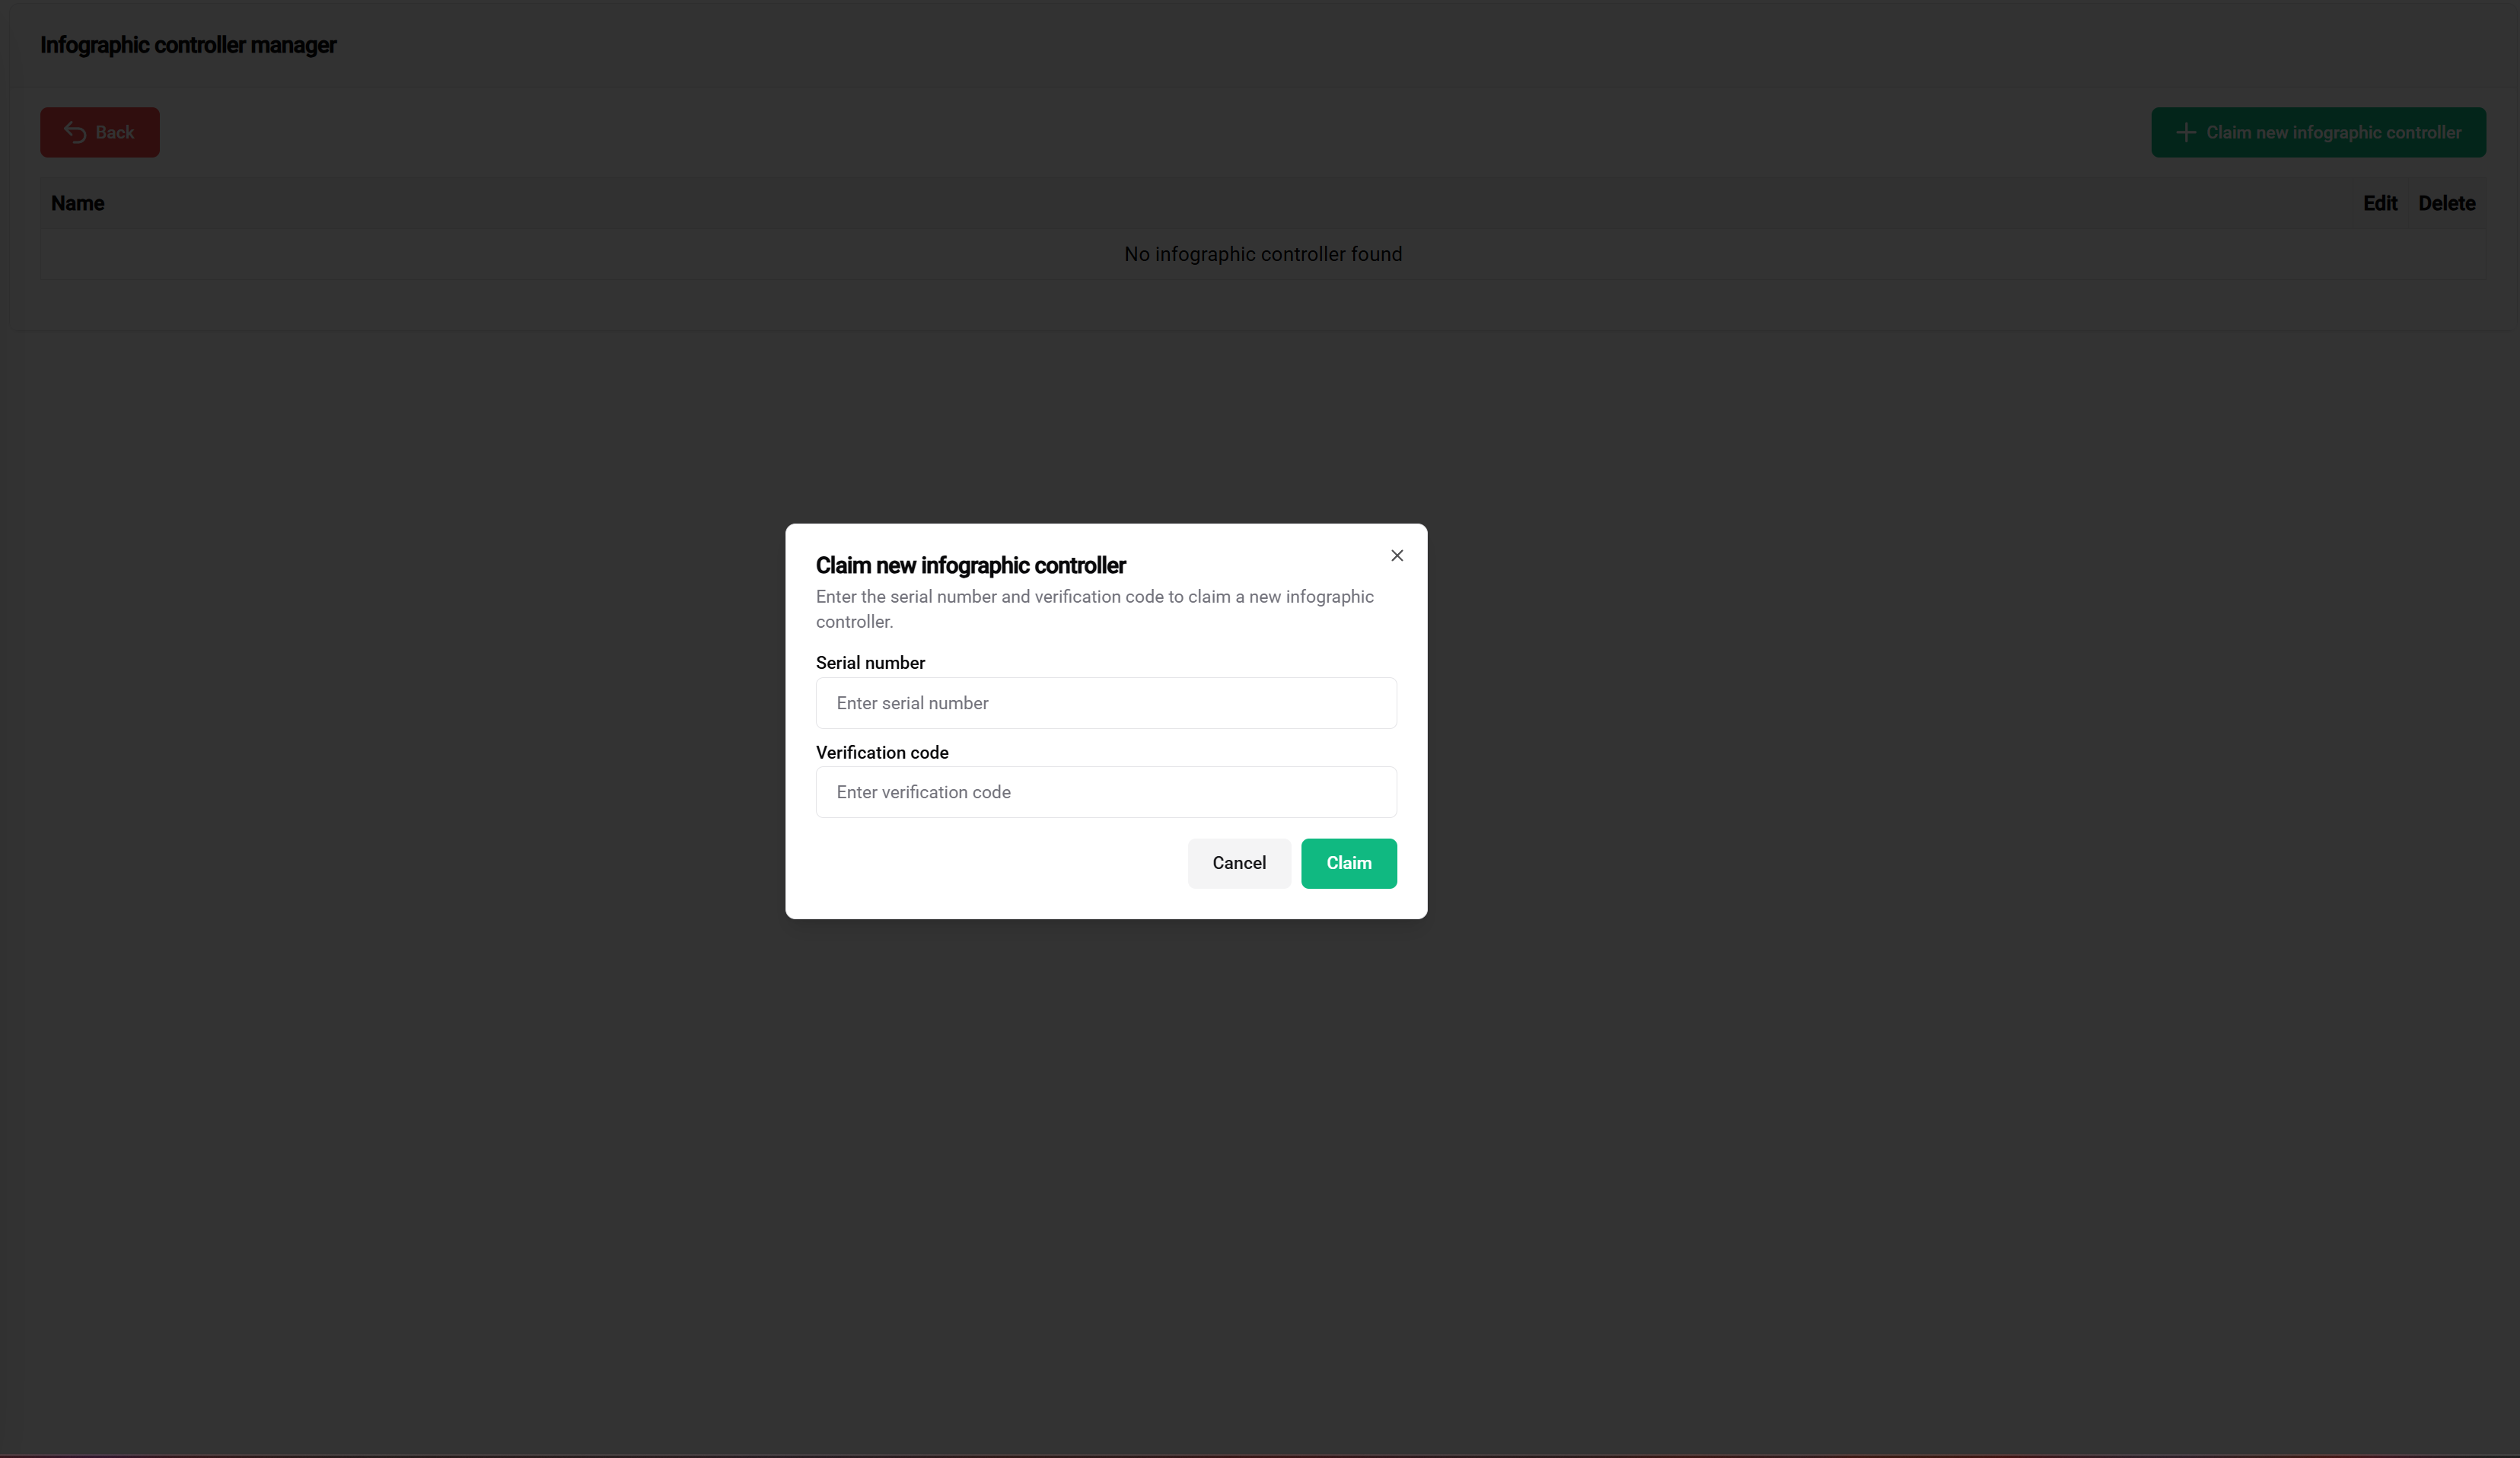
Stappen om te claimen:
- Klik op de groene "Claim Controller" knop
- Voer het serienummer in (gevonden op de controllersticker)
- Voer de verificatiecode in (gevonden op de controllersticker)
🔐 Bewaar je controllergegevens veilig! Sla het serienummer en de verificatiecode op in een beveiligd bestand (Excel, tekstbestand, enz.). Ons ondersteuningsteam kan om beveiligingsredenen geen verificatiecodes verstrekken.
Met Succes Geclaimde Controller

✅ Succes! Je controller verschijnt nu in de tabel met opties om:
- 📝 Bewerk de naam van de controller
- 🔓 Ongeldig maken indien nodig
2. Openbare display Sjabloon
📖 Voor uitgebreide richtlijnen voor het maken van sjablonen, bezoek de Openbare display Sjabloon documentatiepagina.
In deze stap ga je de visuele lay-out ontwerpen voor je installatie. Sjablonen dienen als herbruikbare blauwdrukken die definiëren hoe je openbare display gestructureerd en weergegeven zal worden.
📝 Aan de Slag Opmerking: Deze sectie biedt essentiële stappen voor het maken van sjablonen. Voor geavanceerde aanpassingsopties en gedetailleerde configuraties, raadpleeg de volledige sjabloon documentatie.
Toegang tot Sjabloonbeheer
Navigatiestappen:
- Ga naar 'Openbare displays' in de zijbalk
- Klik op de 'Openbare display Sjabloon' knop op de overzichtpagina
Sjabloon Beheerinterface

De sjabloon tabel biedt:
- 📋 Overzicht van al je sjablonen
- ➕ Voeg nieuwe sjablonen toe
- ✏️ Bewerk bestaande sjablonen
- 🗑️ Verwijder sjablonen
Header Configuratie van het Sjabloon
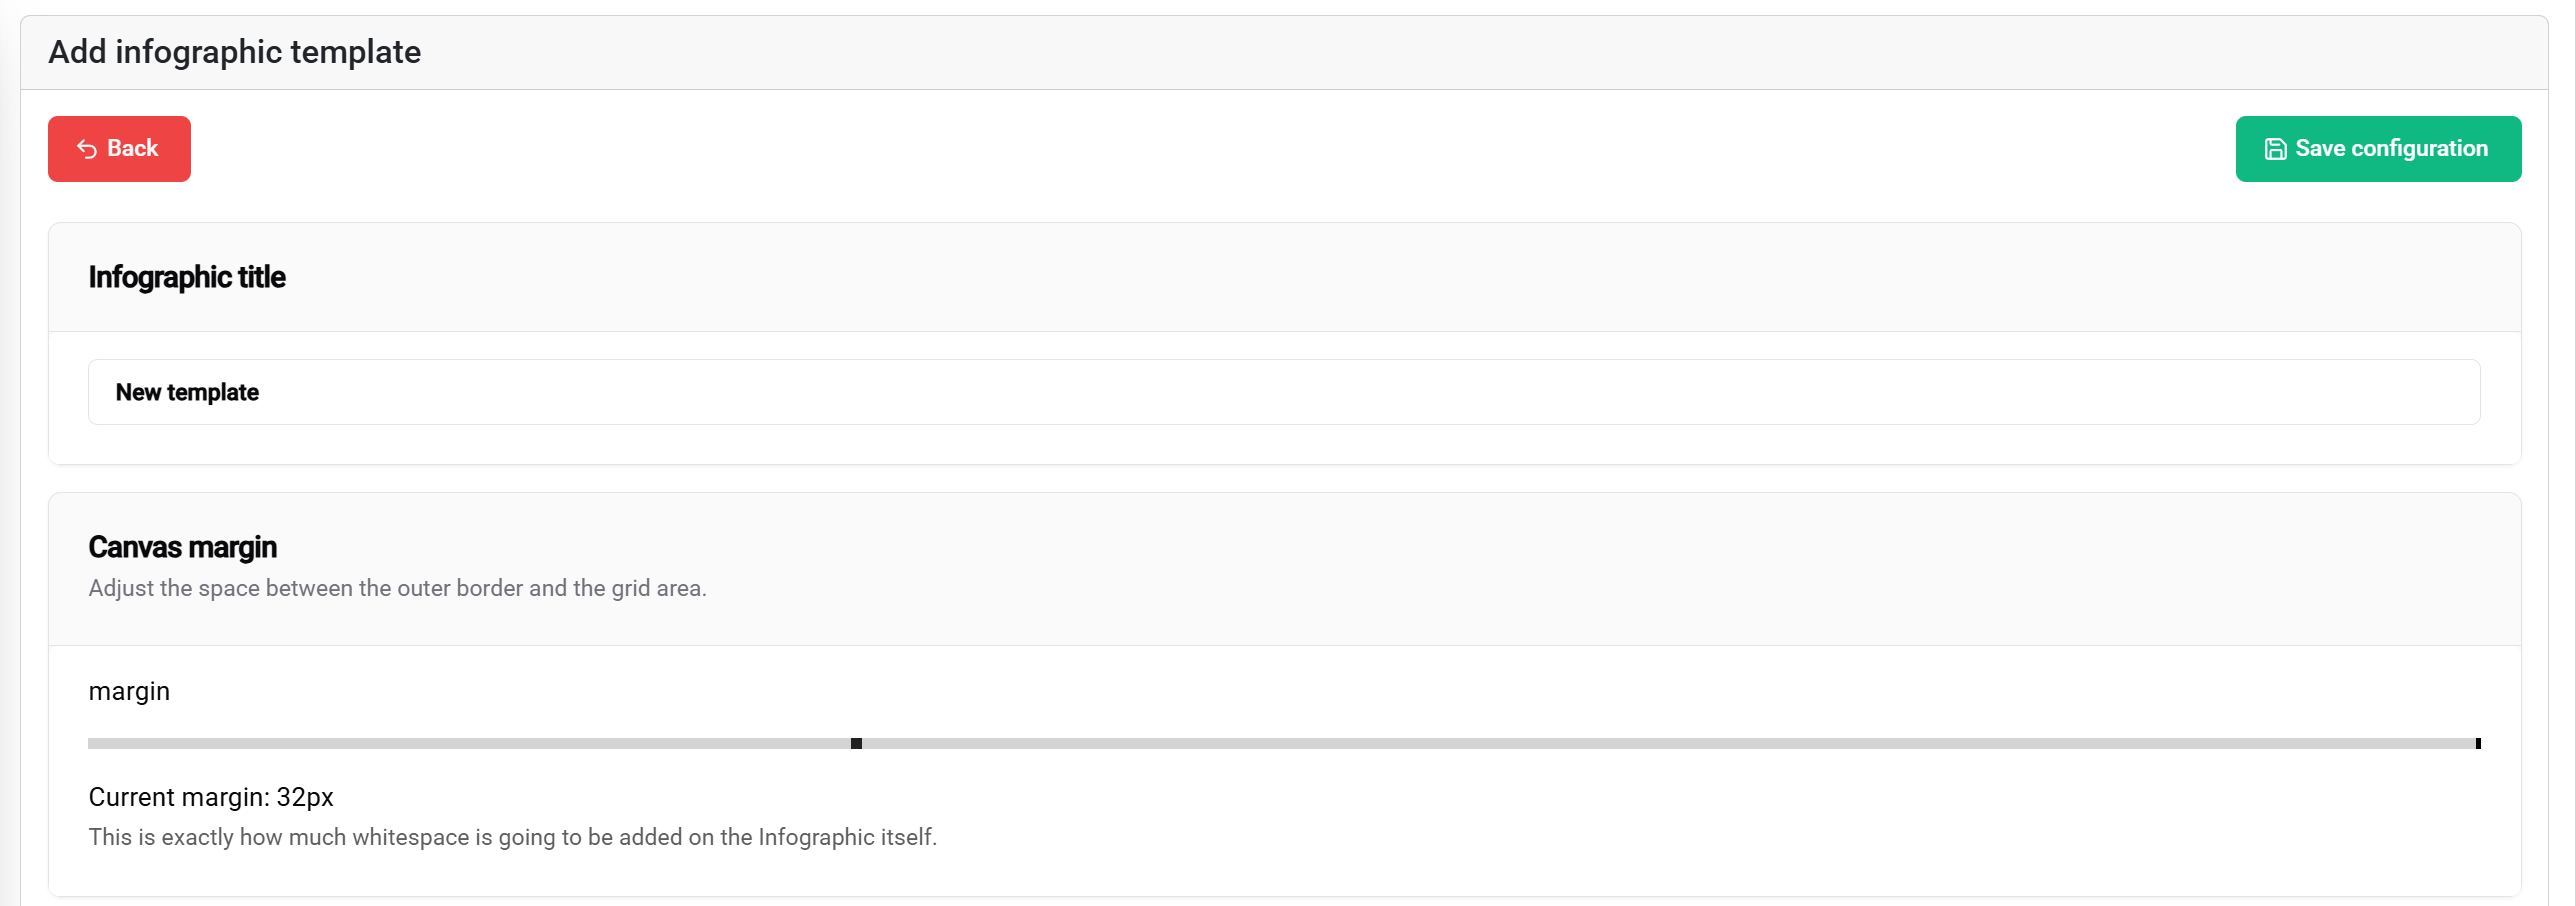
Headerinstellingen omvatten:
- 📝 Sjabloontitel - Geef je openbare display een naam
- 📐 Marges - Definieer de ruimte rond de inhoud
- 💾 Opslaan knop - Gelegen in de rechterbovenhoek
Blok Lay-out Systeem
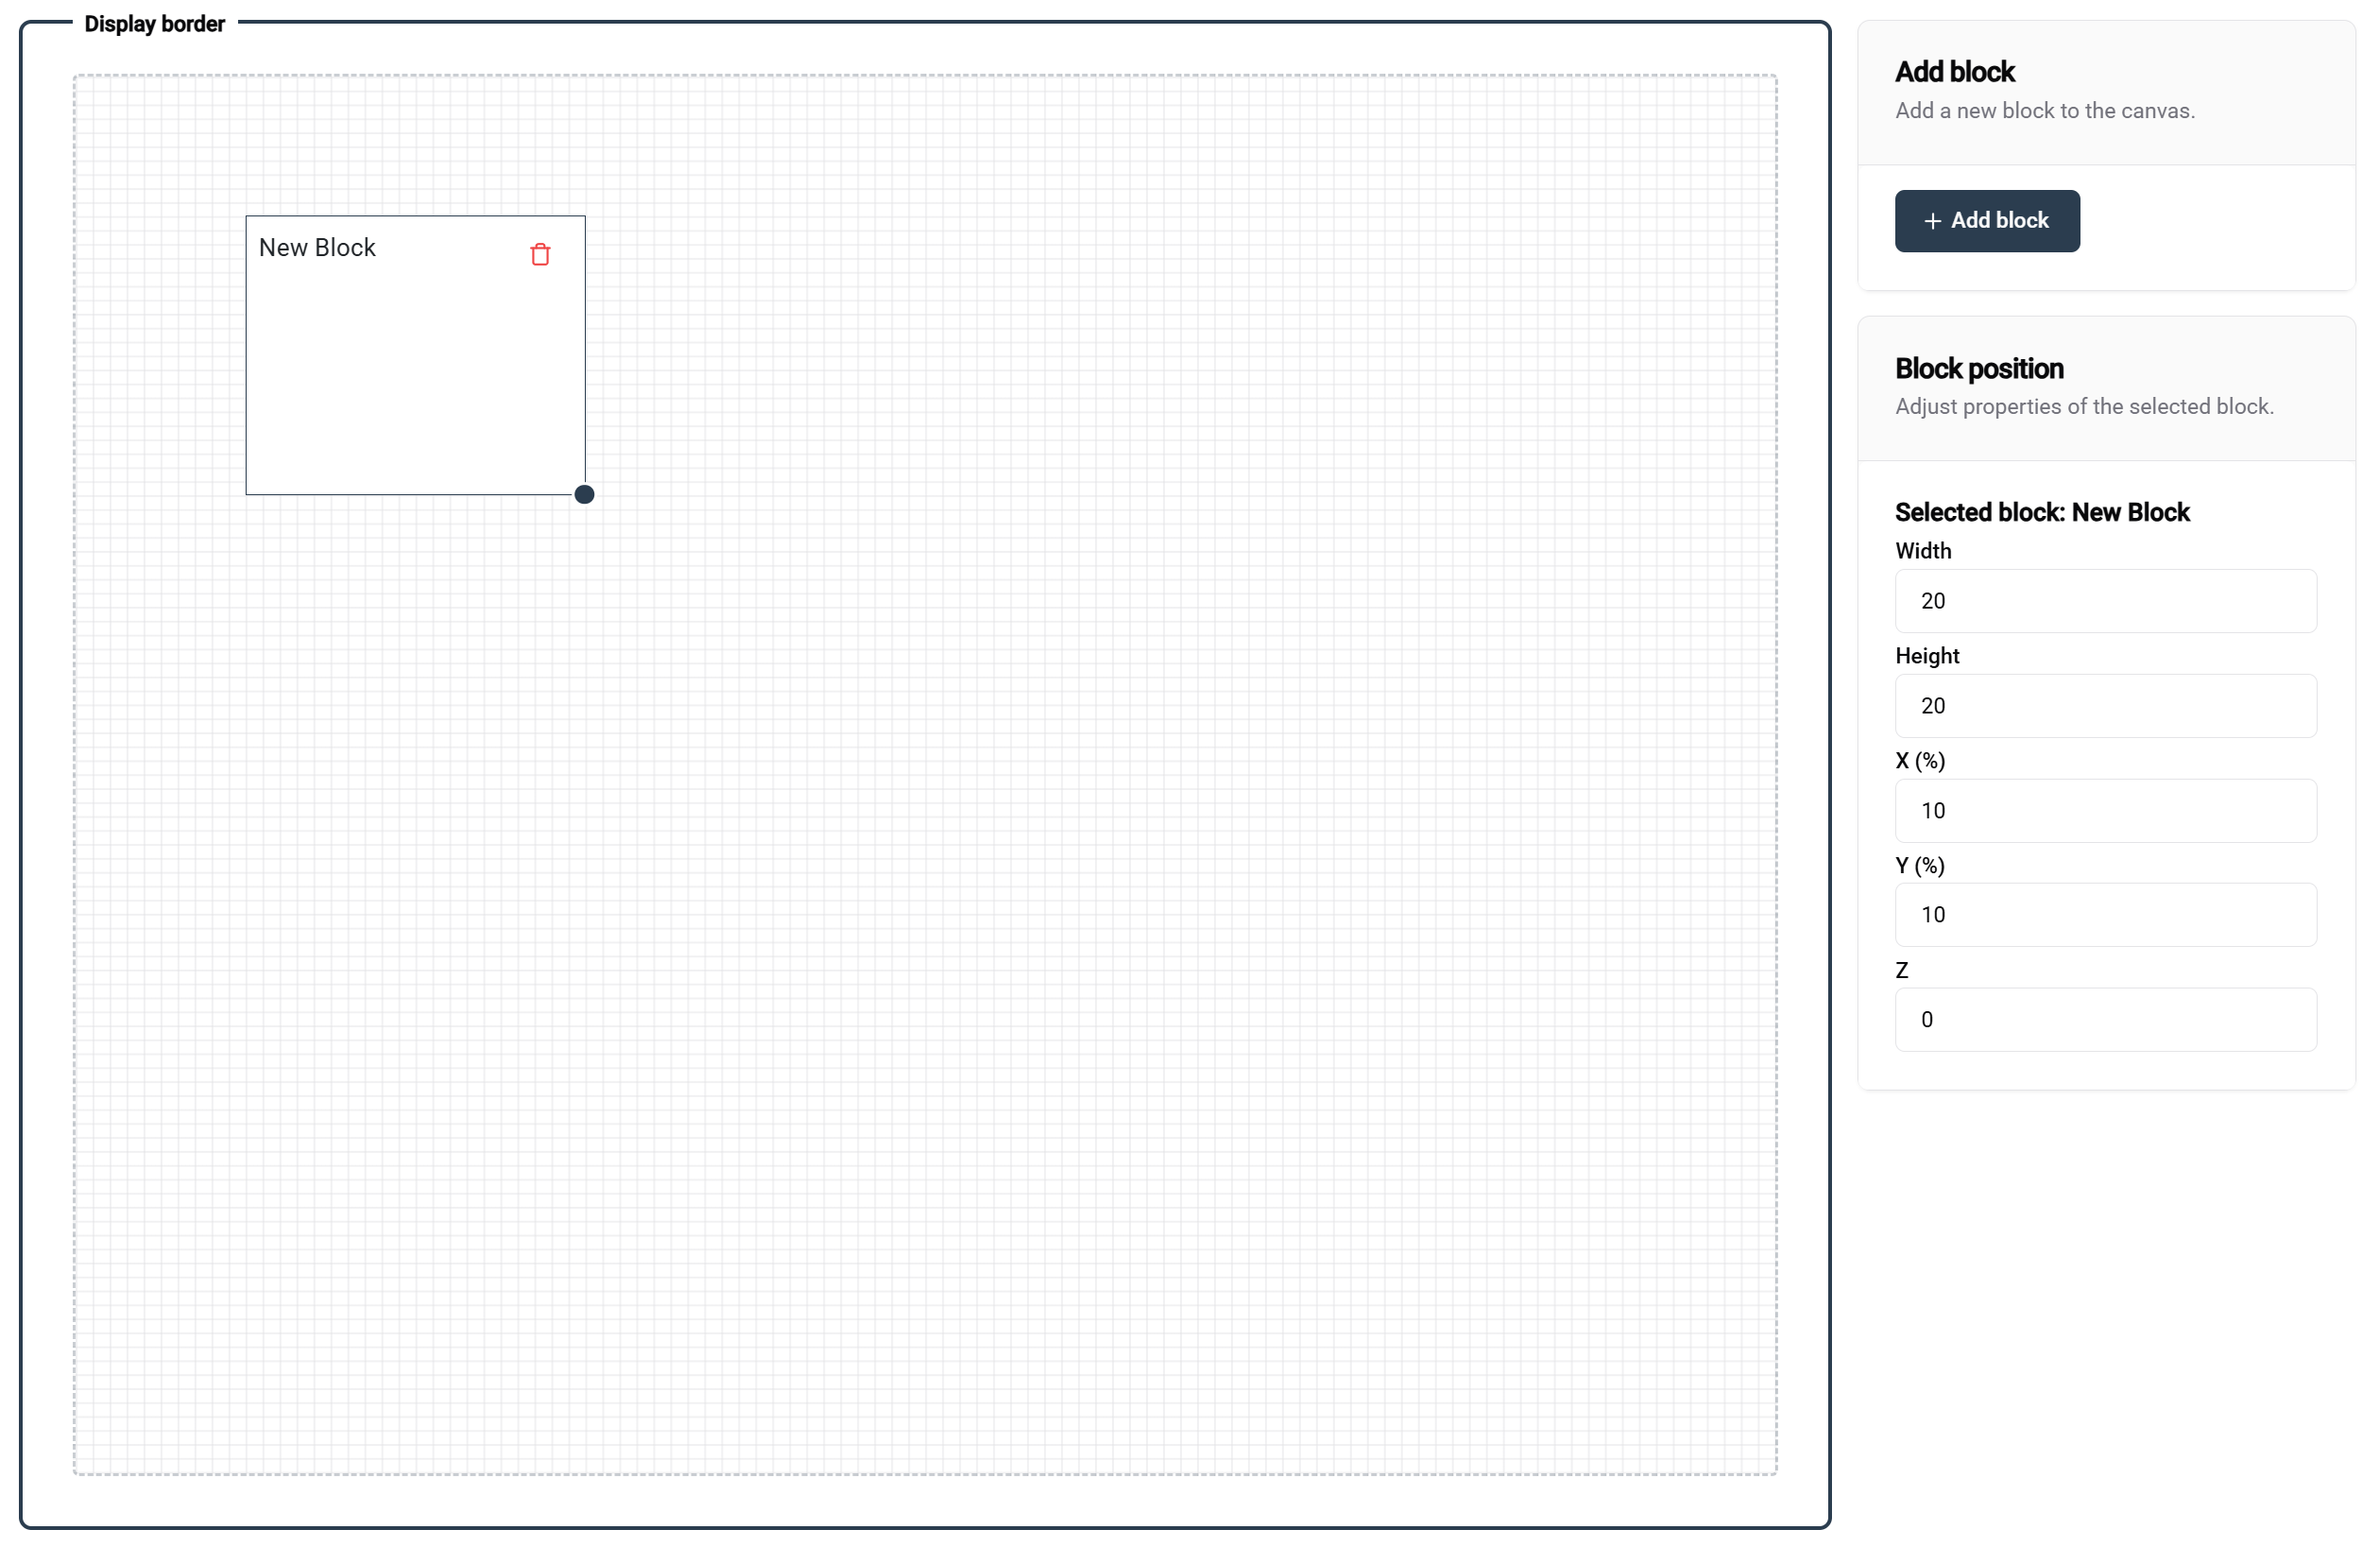
Werken met blokken:
- ➕ Voeg blokken toe met de knop in de rechterbovenhoek
- 🎯 Positioneer blokken via slepen en neerzetten
- 📏 Wijzig de grootte van blokken door de rechteronderhoek te slepen
📐 Details van het Raster Systeem:
- Rastergrootte: 100×100 (percentage-gebaseerd)
- Voorbeeld lay-outs:
- Twee blokken met 50% breedte × 100% hoogte = naast elkaar lay-out
- Eén blok met 100% breedte × 100% hoogte = volledige dekking
🎛️ Precisie Controle:
- Gebruik het paneel aan de rechterkant voor exacte positioneringswaarden
- Perfect voor fijn afstemmen van blokplaatsing
Blokconfiguratie
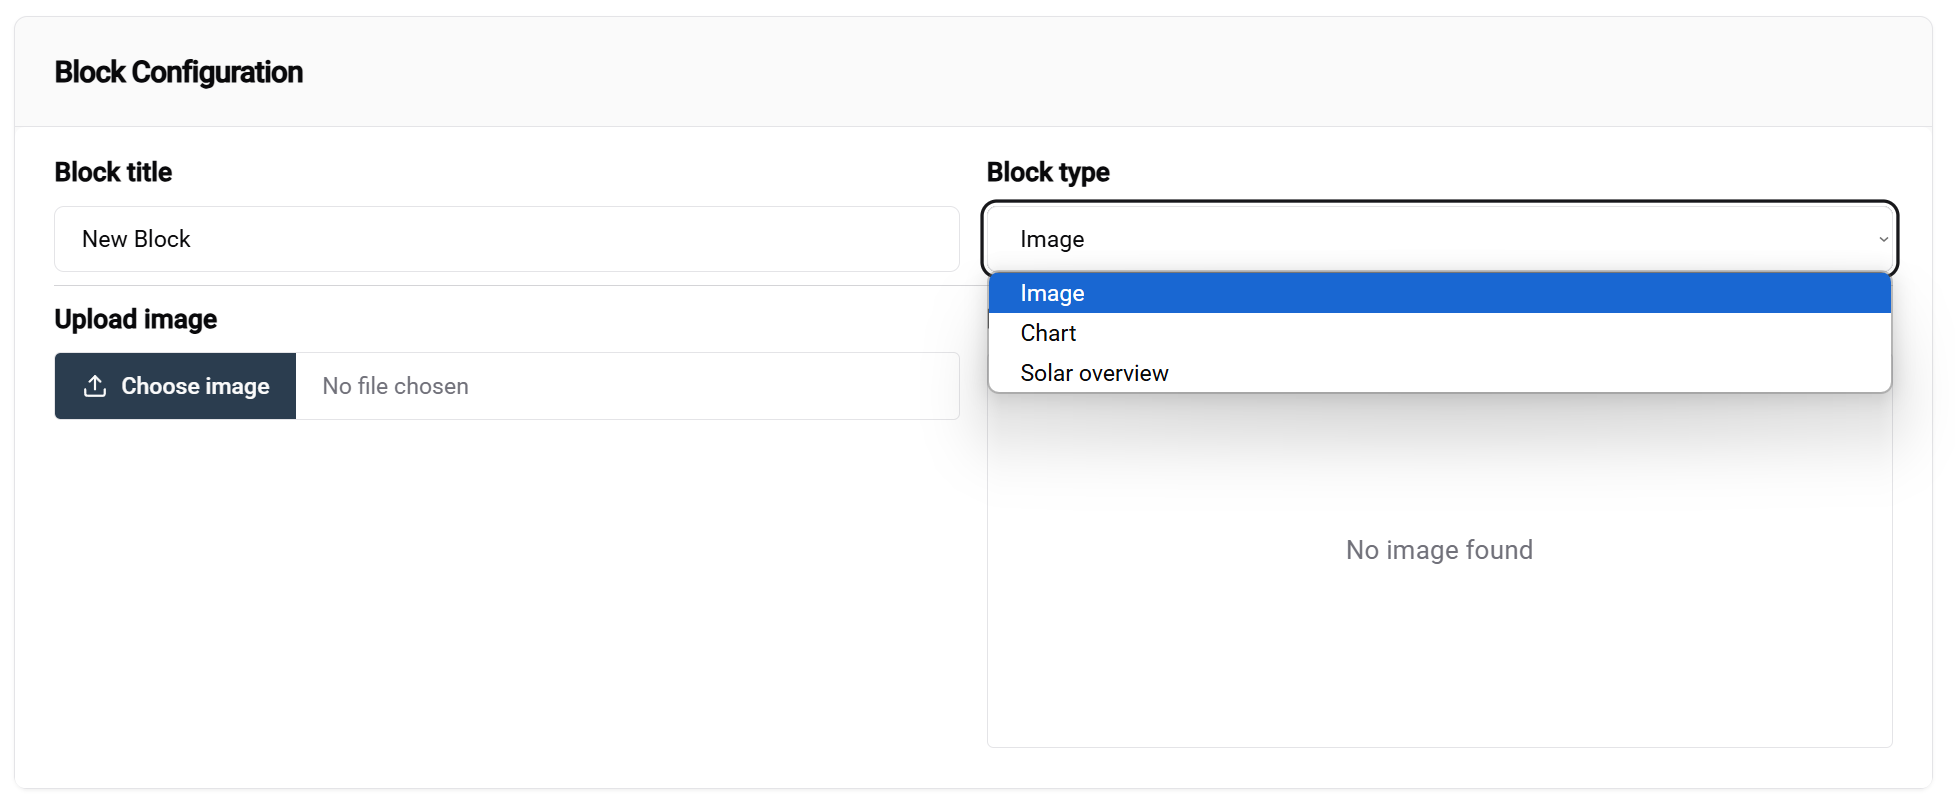
Configuratieworkflow:
- Selecteer een blok om zijn opties te bekijken
- Kies het bloktype uit het vervolgkeuzemenu (de belangrijkste instelling)
- Configureer blok-specifieke instellingen in het onderste paneel
📚 Leer Meer: Gedetailleerde informatie over verschillende bloktypes is beschikbaar in de Openbare display Sjabloon documentatie.
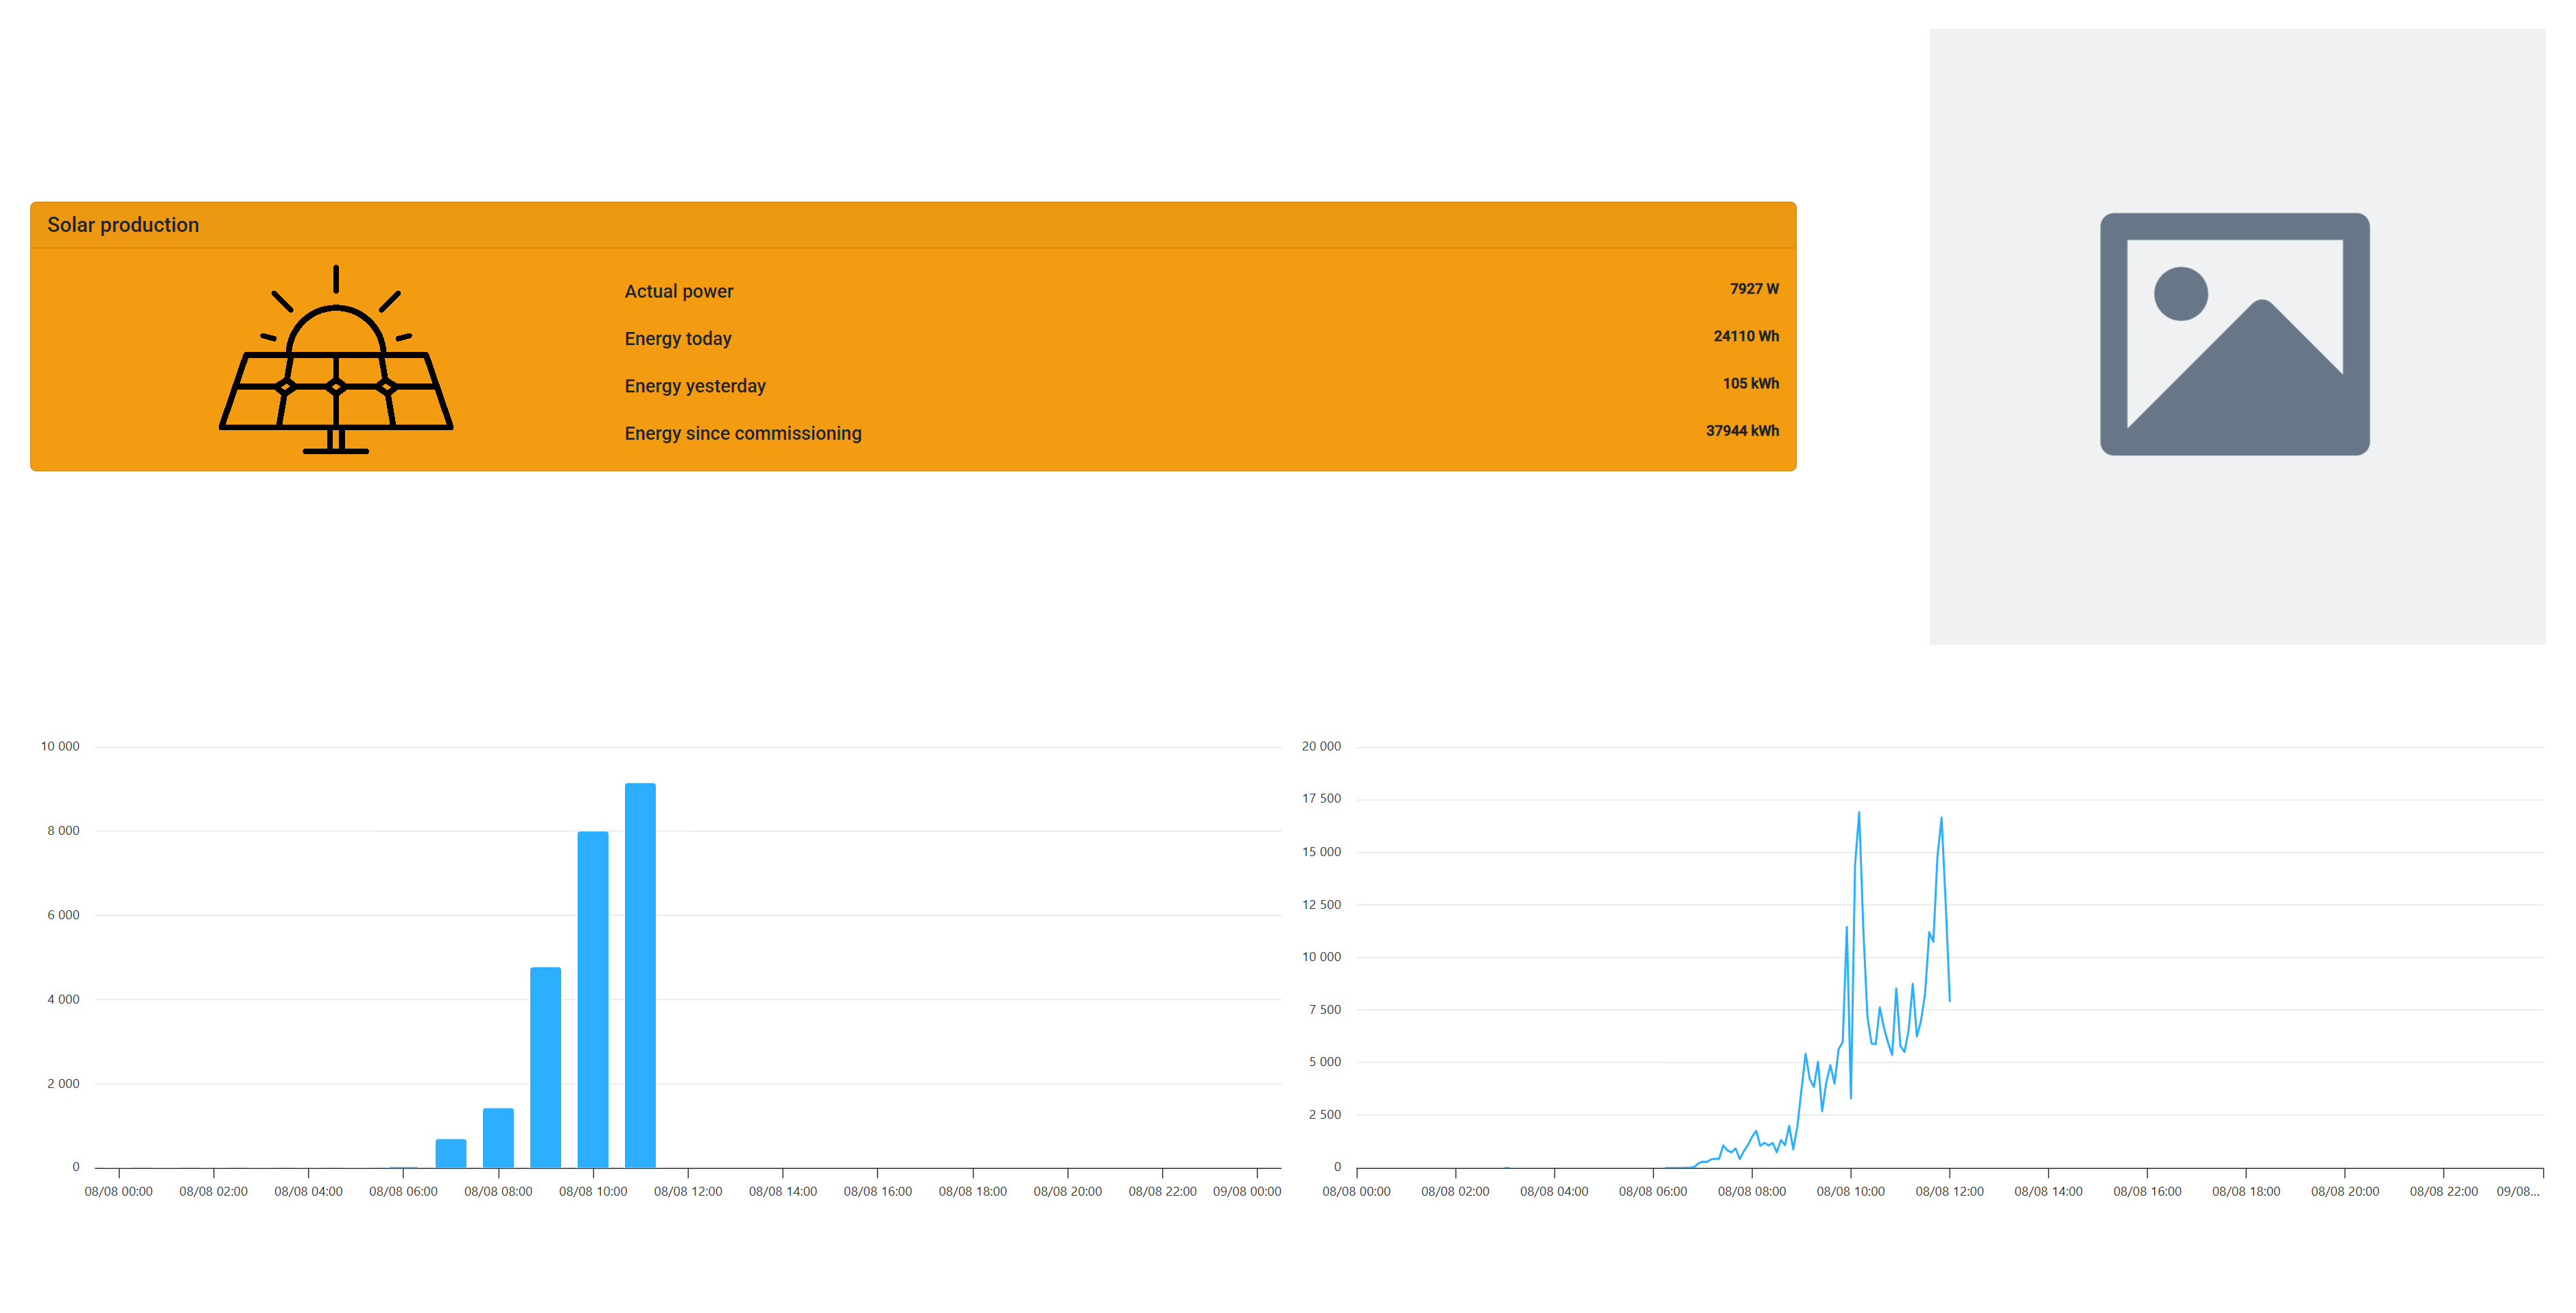
Voorbeeld van Sjabloonconfiguratie
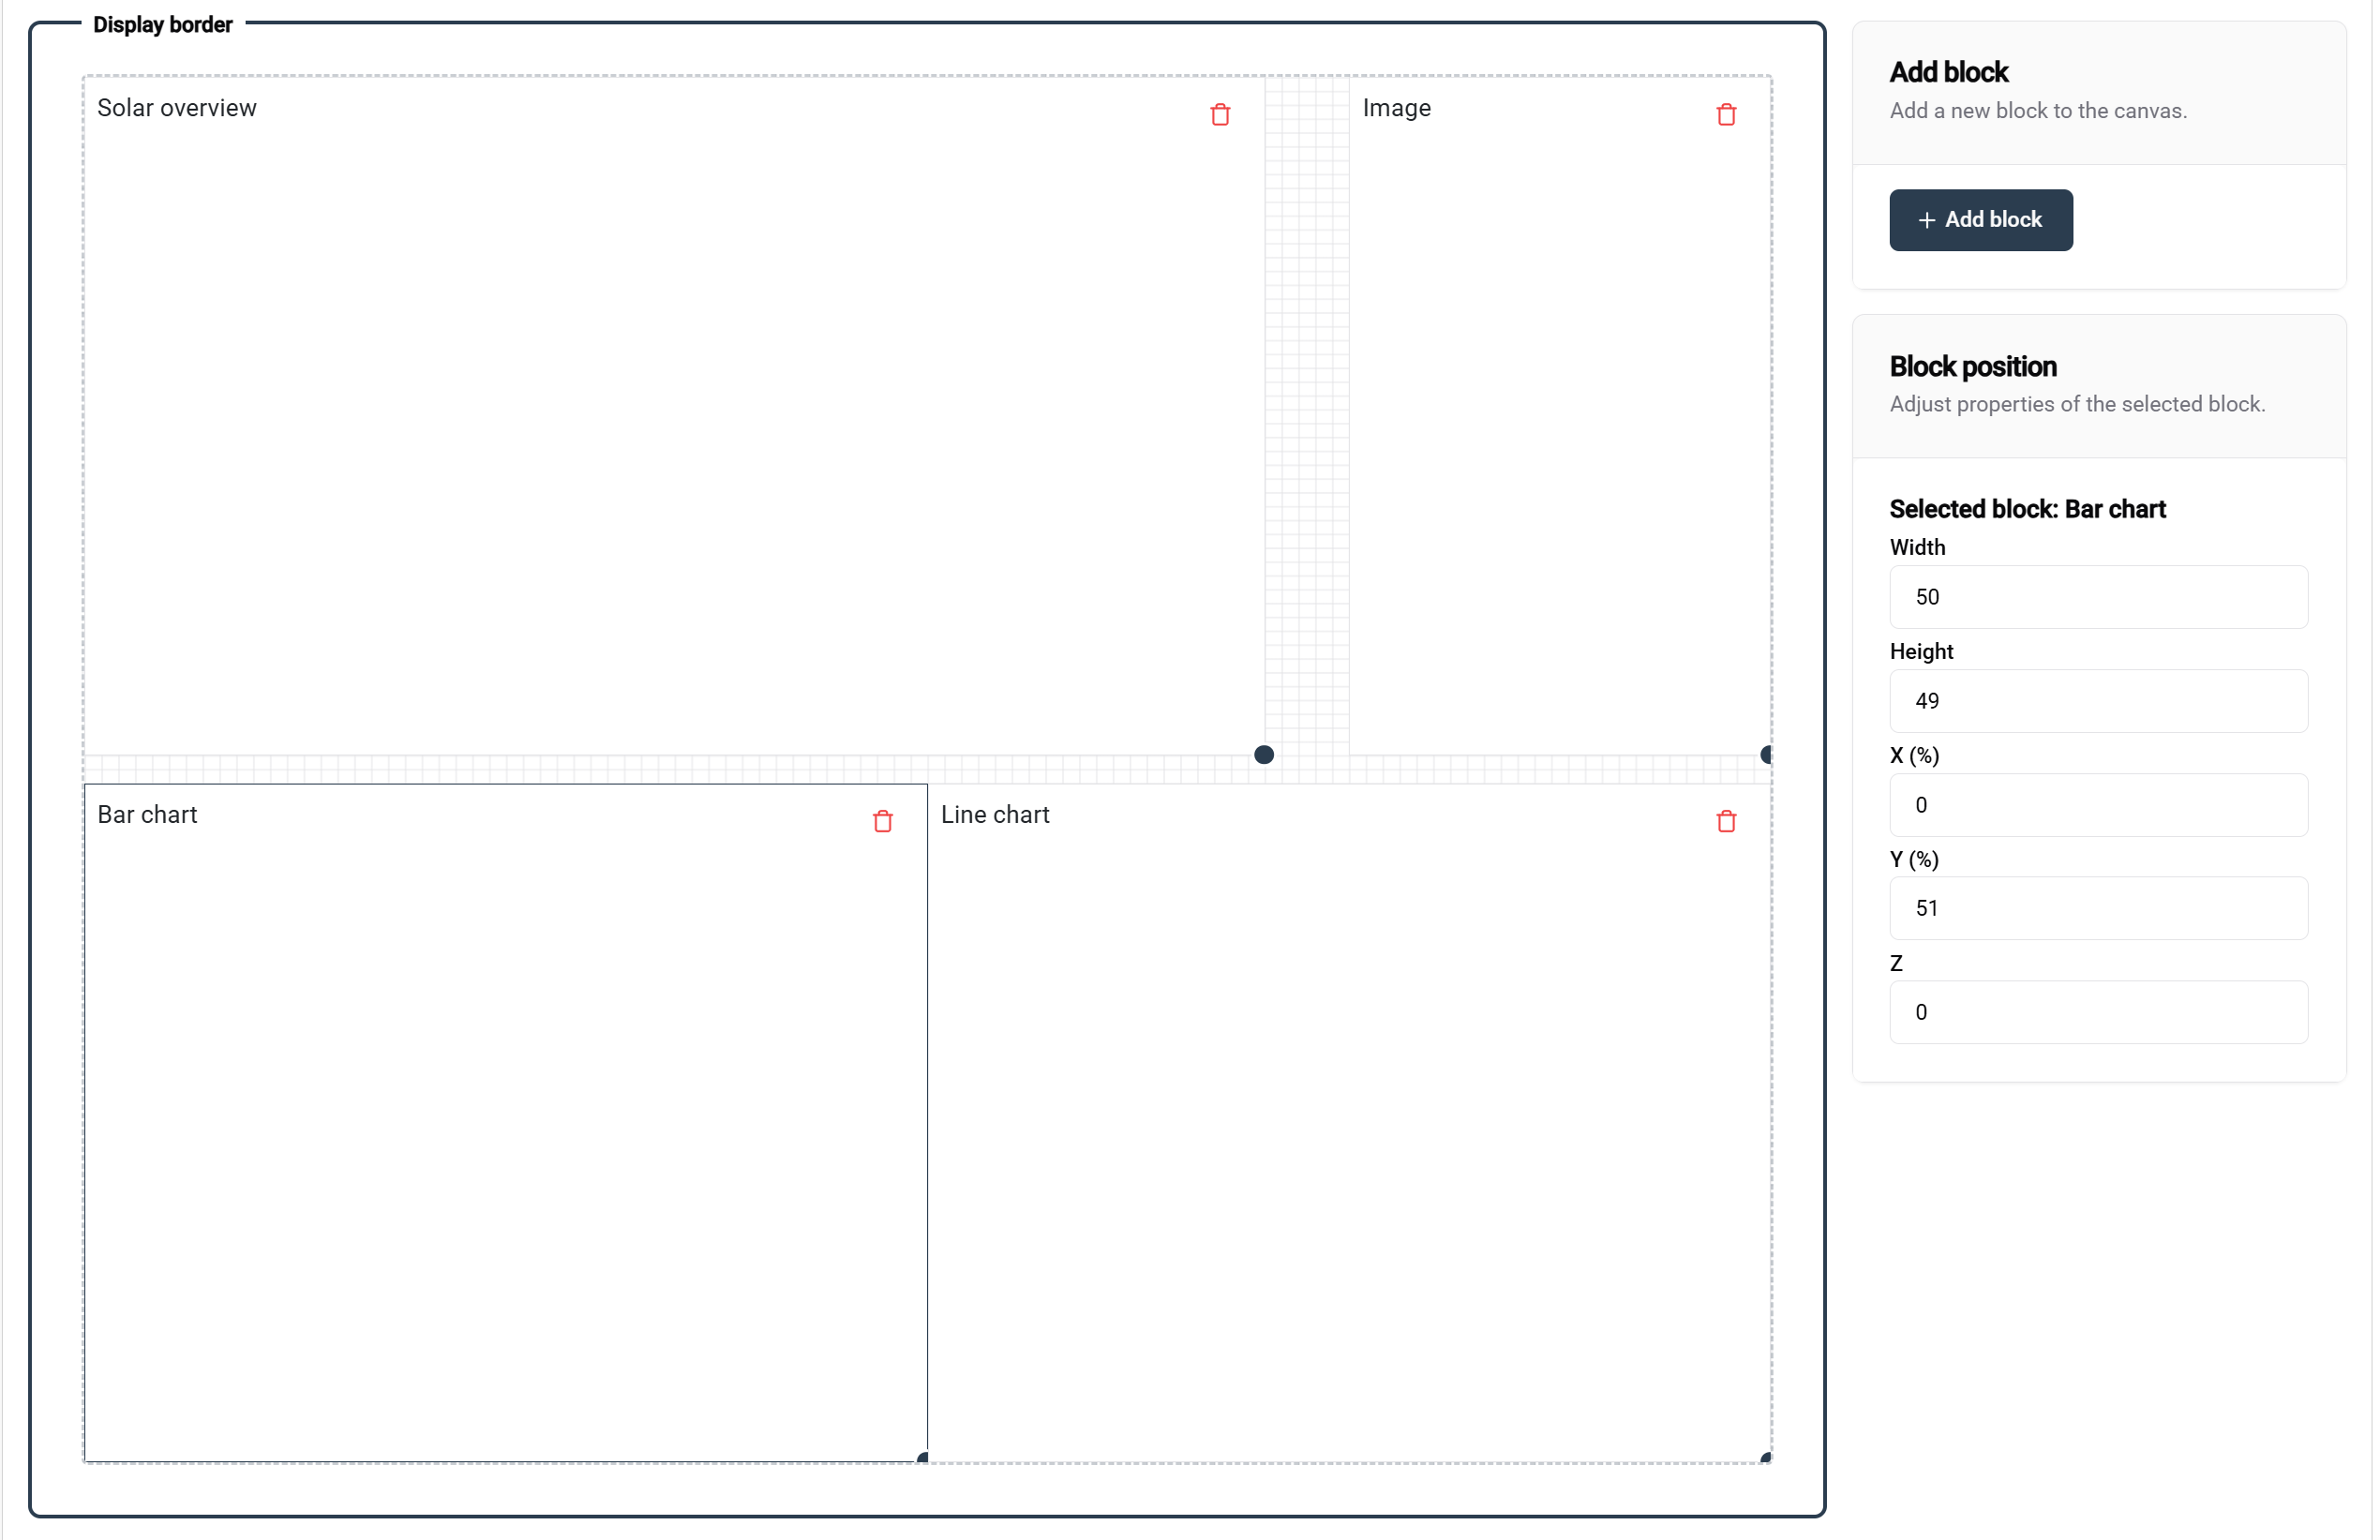
Dit voorbeeld toont een volledige sjabloonopstelling met gelabelde blokken die hun respectieve configuraties en doeleinden tonen.
💾 Bewaar je sjabloon:
- Klik op de opslaan knop (rechterbovenhoek) wanneer je tevreden bent met je ontwerp
- Je sjabloon wordt beschikbaar voor gebruik in configuraties
Sjabloon Overzicht

✅ Sjabloon succesvol aangemaakt! Je nieuwe sjabloon verschijnt nu in de beheer tabel, klaar voor:
- ✏️ Verdere bewerking
- 🗑️ Verwijdering indien nodig
- ⚙️ Configuratie in de volgende stap
3. Openbare display Configuratie
📖 Voor gedetailleerde configuratieopties, bezoek de Openbare display Configuratie documentatiepagina.
In deze laatste stap pas je je sjabloon toe op een specifieke installatie en koppel je het optioneel aan je geclaimde controller.
🎯 Resultaten na voltooiing:
- Met controller: Bekijk je openbare weergave op het fysieke displayapparaat
- Zonder controller: Bekijk een voorbeeld van hoe je openbare weergave eruit zal zien wanneer deze wordt geïmplementeerd
🧪 Testvoordeel: Je kunt sjablonen en configuraties voorbereiden en testen voordat je ze aan controllers koppelt, zodat je kunt zorgen dat alles perfect werkt voordat je gaat implementeren.
Toegang tot Configuratie
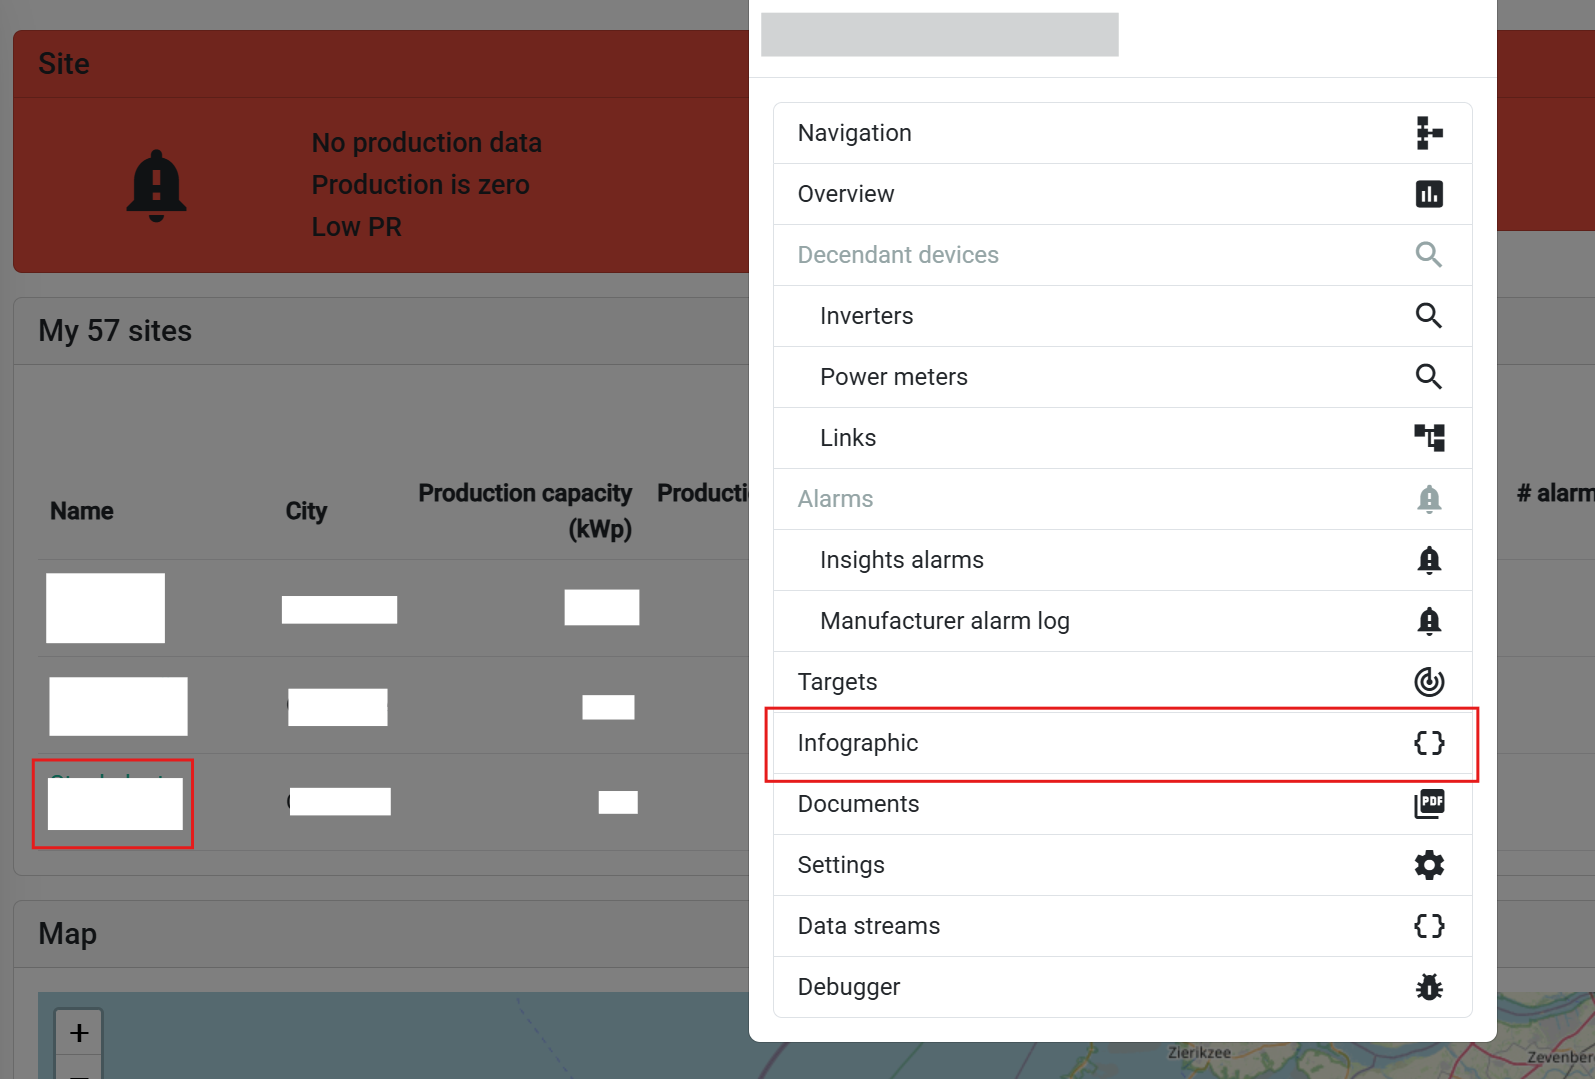
Navigatiestappen:
- Ga naar je installatie-overzichtspagina
- Selecteer een installatie of controller uit de lijst
- Kies 'Openbare weergave' uit het pop-upmenu
Configuratiebeheer

De configuratietabel toont:
- 📋 Alle bestaande configuraties voor de geselecteerde installatie
- ➕ Nieuwe configuratie knop (linkerbovenhoek)
Een Nieuwe Configuratie Aanmaken

Configuratie-instelling:
- Selecteer sjabloon uit het dropdownmenu
- Kies je eerder gemaakte sjabloon
- Bekijk beschikbare blokken en hun bewerkbare eigenschappen
Blok-specifieke Configuratie
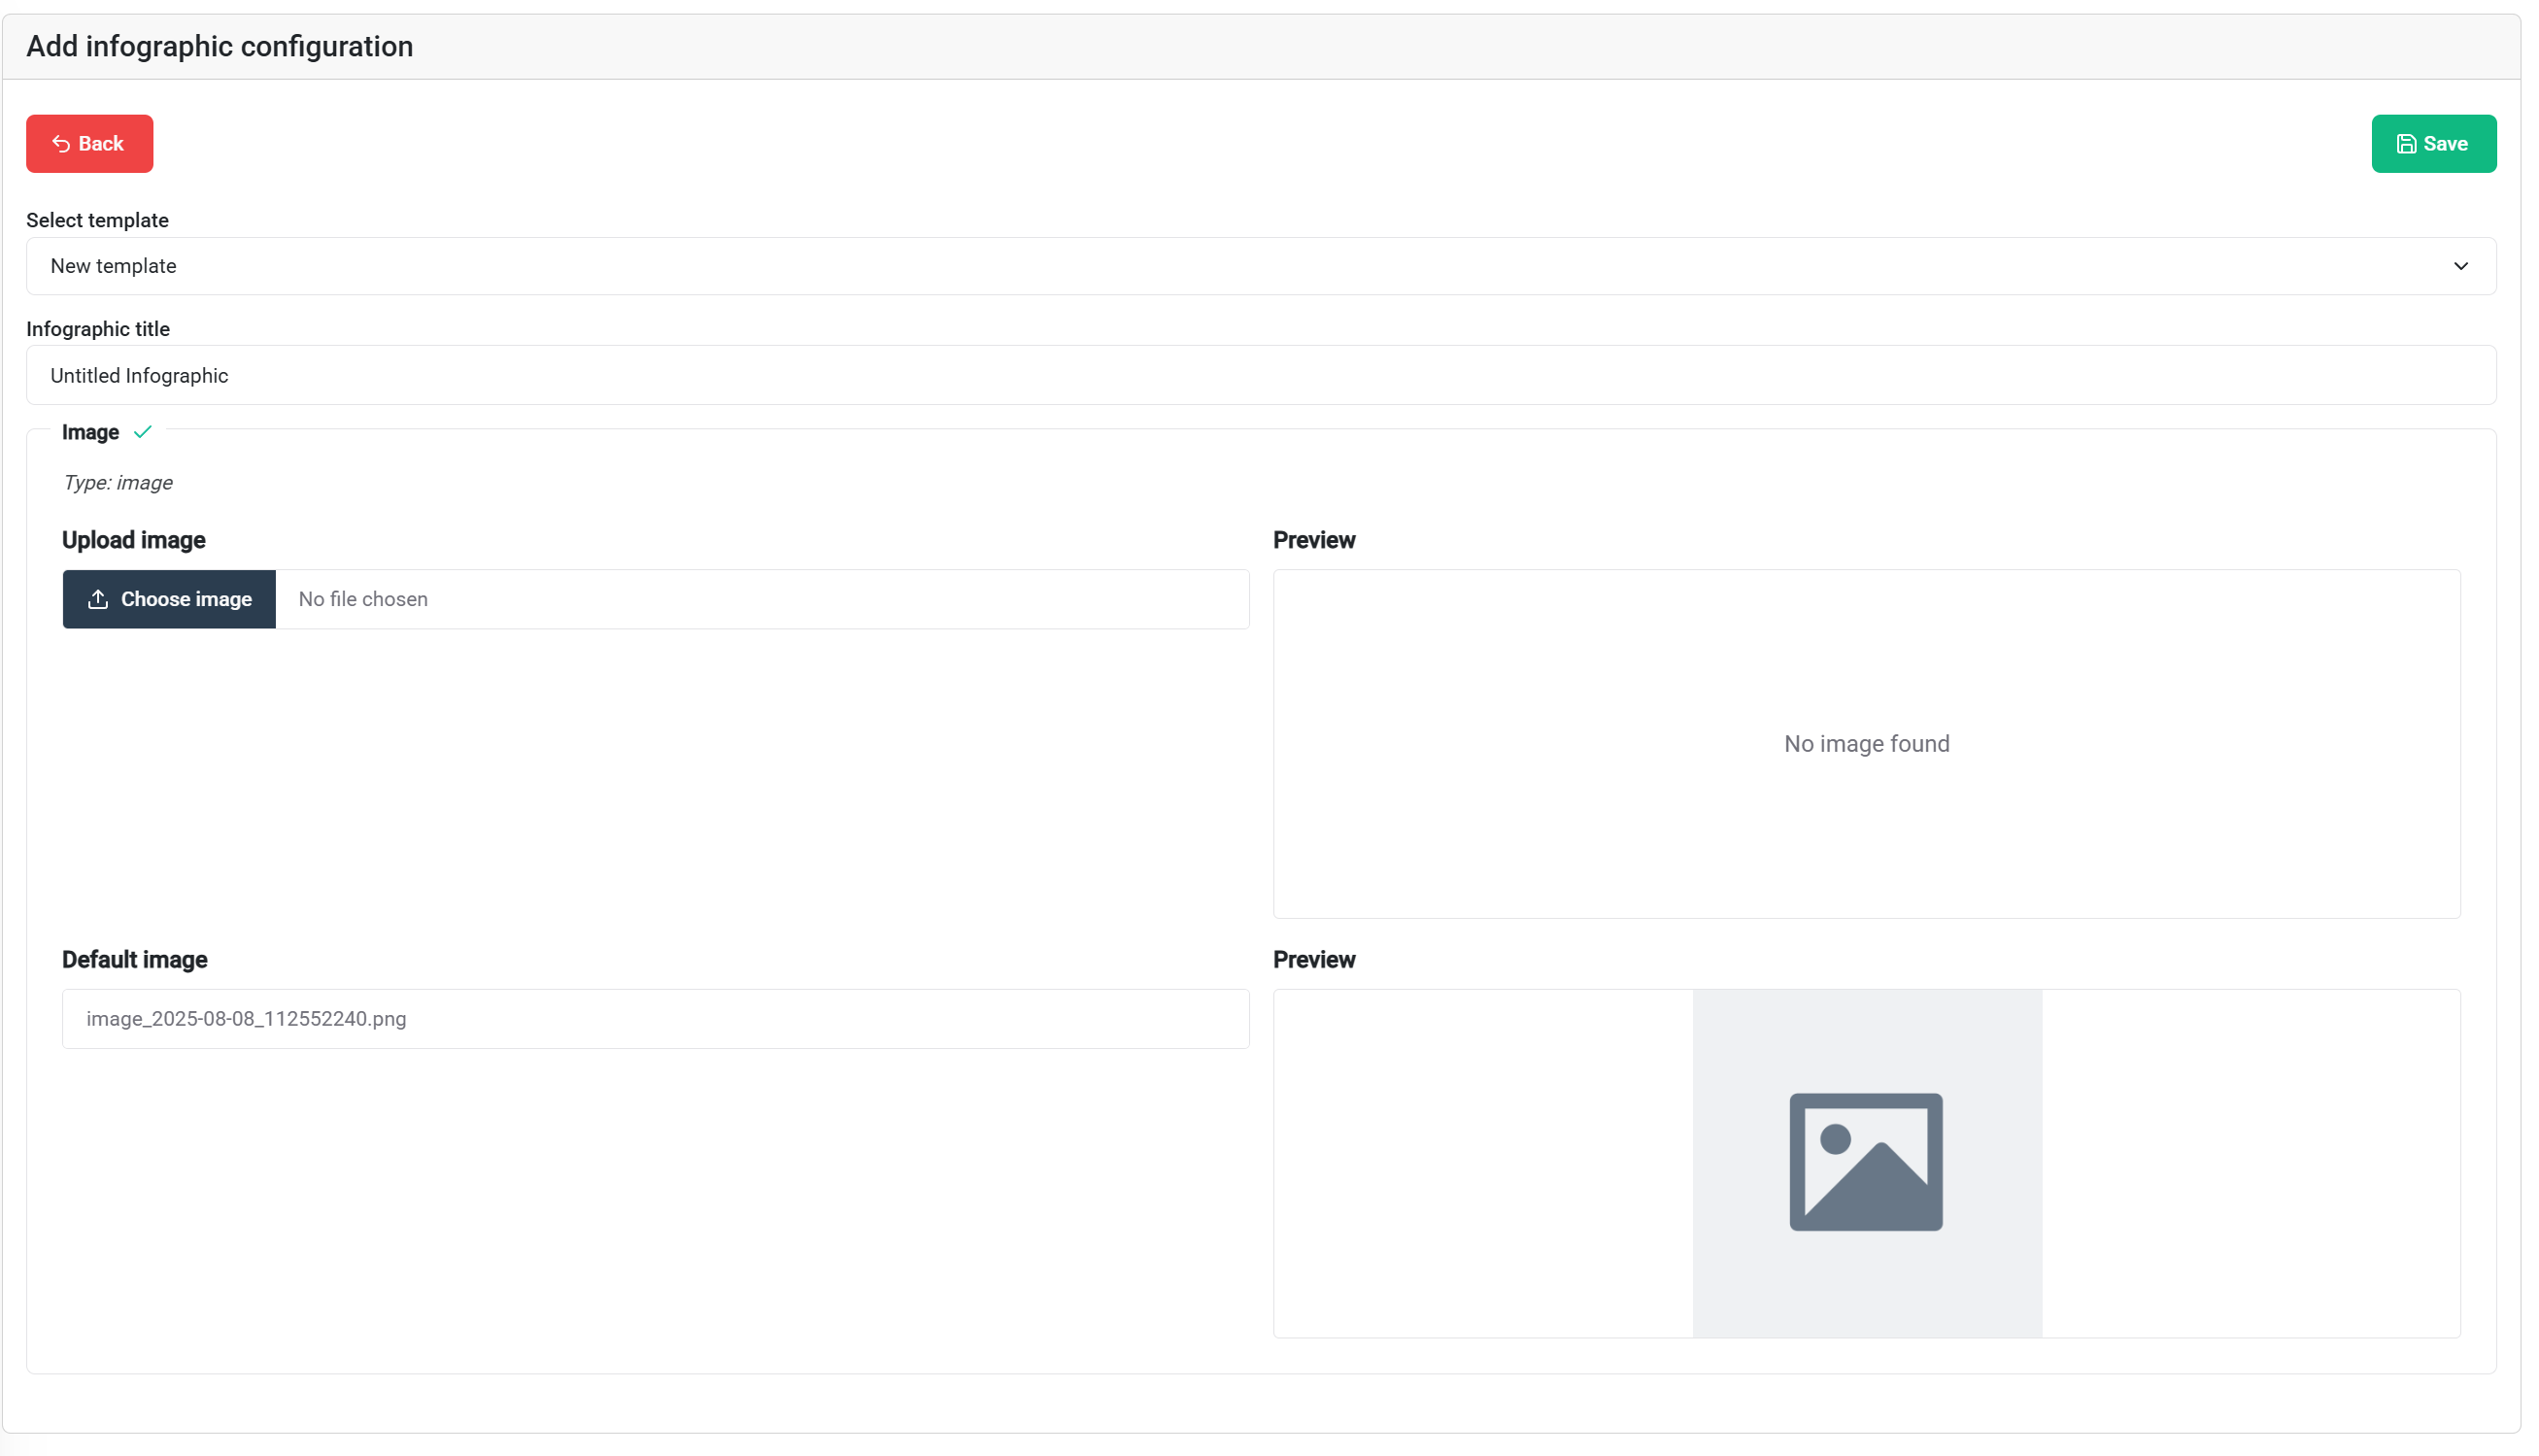
Configuratie-opties:
- Niet alle blokken zijn momenteel configureerbaar. Dit zal veranderen naarmate de ontwikkeling voortgaat.
- Vooraf ingevulde inhoud van sjablonen kan als-is of gepersonaliseerd worden gebruikt
- Standaardinstellingen overschrijven met installatie-specifieke inhoud
💡 Tip: Standaardafbeeldingen van sjablonen bieden een basis - pas alleen aan wat installatie-specifiek moet zijn.
💾 Sla je configuratie op met de opslaanknop rechtsboven wanneer je klaar bent.
Configuratie Acties

Beschikbare acties voor opgeslagen configuraties:
- 🎛️ Claim Controller - Koppel aan hardwareapparaat
- 👁️ Bekijk - Voorbeeld van het eindresultaat
- ✏️ Bewerk - Wijzig configuratie-instellingen
- 🗑️ Verwijder - Verwijder configuratie
Bekijk Je Openbare Weergave
Voorbeeldfuncties:
- Realtime visualisatie van hoe de openbare weergave op de controller zal verschijnen
- Responsief testen - verander de grootte van je browservenster om te zien hoe de lay-out zich aanpast aan verschillende schermformaten
- Eindvalidatie voordat de controller wordt geïmplementeerd
Koppelen aan Controller
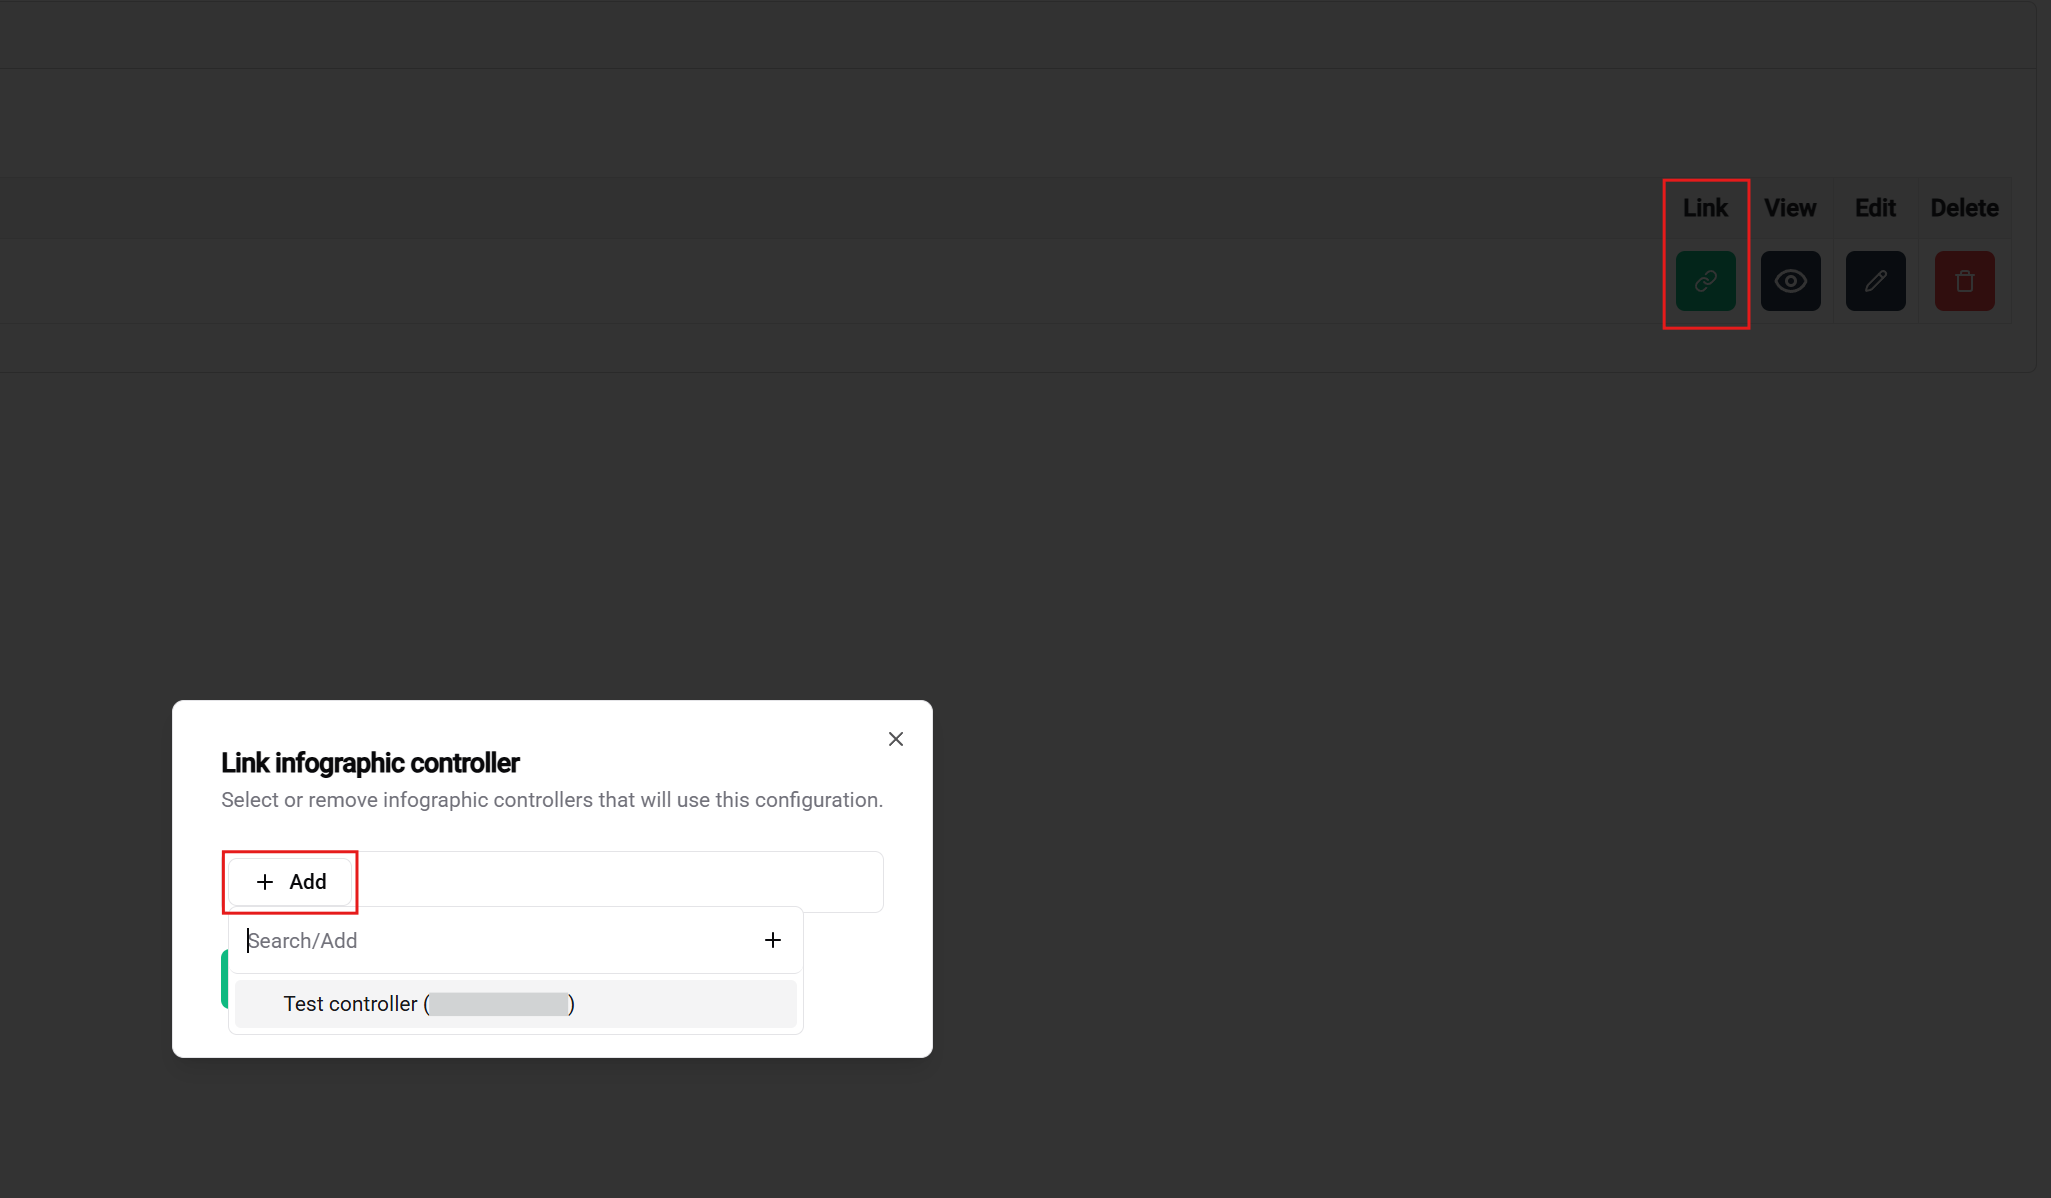
Laatste implementatiestap:
- Keer terug naar de configuratietabel
- Klik op 'Claim Controller' om je configuratie te koppelen
- Voltooi de inrichting door de fysieke controller aan te sluiten
🎉 Succes! Zodra alles is geconfigureerd, gekoppeld en de controller is aangesloten, zal je aangepaste openbare weergave op het scherm verschijnen.
🎉 Conclusie
Gefeliciteerd! Je hebt met succes een compleet openbaar weergavesysteem ingesteld in SmartgridX.
Wat Je Hebt Bereikt
✅ Controllerbeheer - Geclaimd en geregistreerd je openbare weergavehardware
✅ Sjabloonontwerp - Een herbruikbare visuele lay-out gemaakt
✅ Configuratie-instelling - Je sjabloon toegepast op een specifieke installatie
✅ Systeemintegratie - Alle componenten verbonden voor live weergave
Volgende Stappen
🖥️ Display Klaar: Je openbare weergavecontroller kan nu je aangepaste visualisatie op elk aangesloten scherm tonen
📚 Breid Je Kennis Uit: Voor geavanceerde functies en gedetailleerde aanpassingsopties, verken de uitgebreide documentatiepagina's voor elk component
💬 Hulp Nodig? Ons ondersteuningsteam staat klaar voor vragen, functieverzoeken of hulp bij probleemoplossing
📚 Gerelateerde Documentatie
Volgende Stappen
Na het succesvol claimen van je controller:
- 🎛️ Koppel Controllers - Verbind met displayhardware
- 📐 Creëer Sjablonen - Ontwerp je visuele lay-outs
- ⚙️ Configureer Displays - Pas sjablonen toe op installaties
🚀 Klaar om meer te creëren? Je kunt nu extra sjablonen en configuraties ontwerpen om aan verschillende installaties en gebruiksgevallen te voldoen!